Published May 25, 2020
Teaching Tuesdays: Mini Archaeological Dig
The Indiana State Museum and Historic Sites may be currently closed due to COVID-19 – but that doesn’t mean we can’t bring some of the museum to you!
On Tuesdays, we’re bringing families tons of educational content that’s easy for caregivers and their kids to do at home with materials you likely have on hand.
This week, embark on your own mini archaeological dig!
Archaeology is the study of the ancient and recent human past through material remains. By analyzing artifacts, archaeologists are able to better understand human culture. Artifacts connect us to people who lived before us. These objects tell a story about how they lived their lives, how they organized their communities and what was important to them.
Archaeologists use a systematic, or orderly, pattern to help them track any artifacts they may find. With a grid system, it is easier to draw and note what is found at each level. Some objects are scooped up with dirt and found when put through a screen. It can then be placed with the objects found from the same square.
Archaeologists will draw a plan showing the placement of artifacts and other objects at each horizontal level. In this activity, you’ll do the same! Let’s get started.
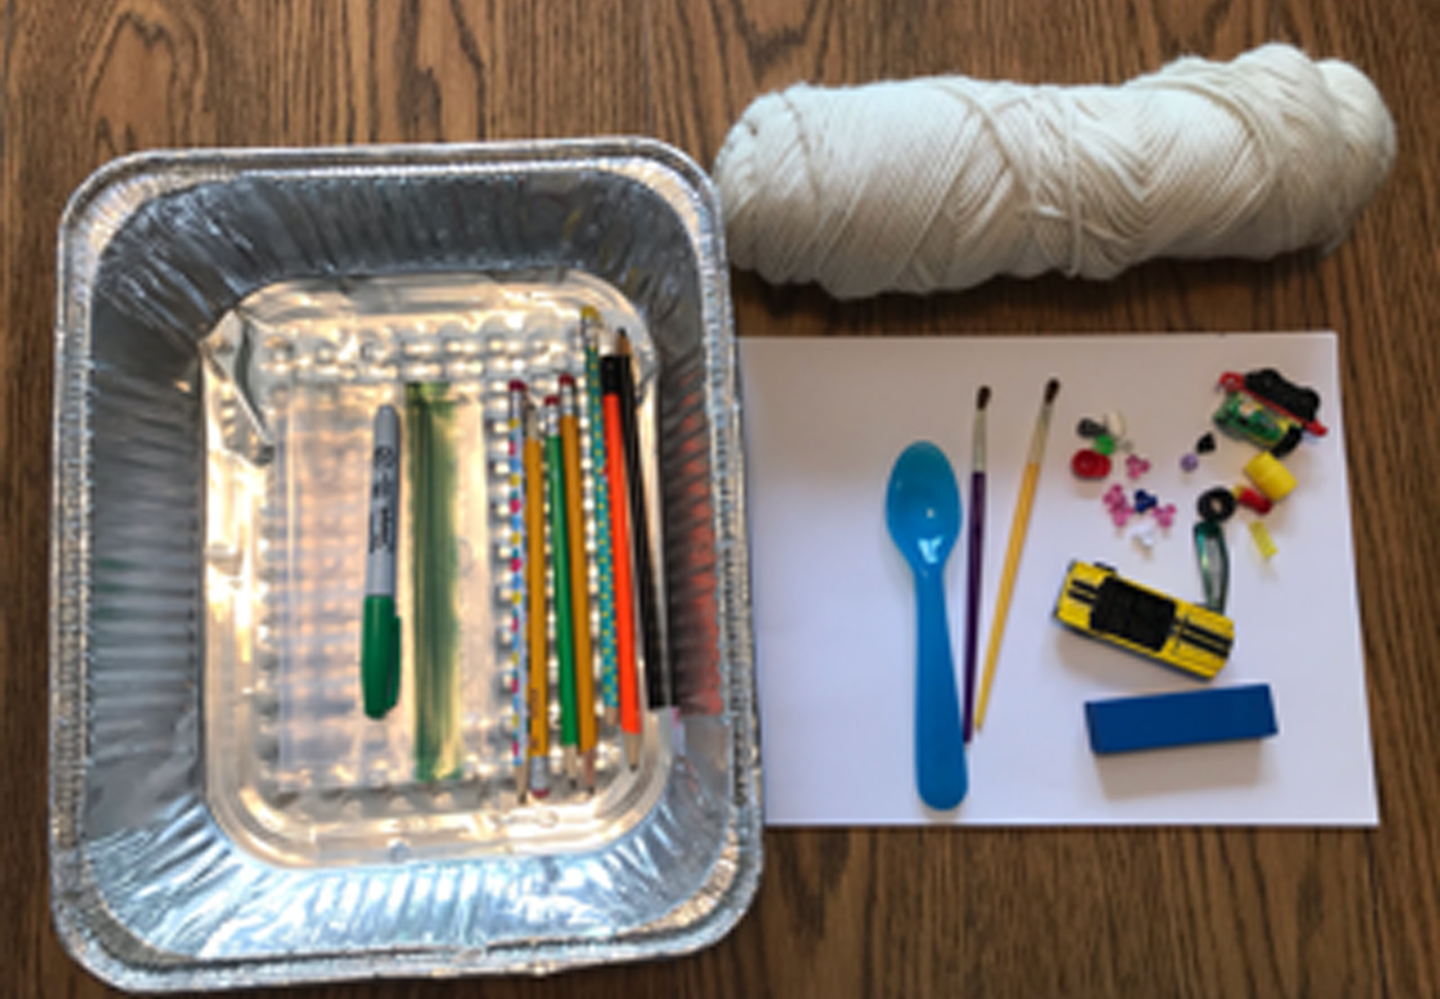
Materials you will need
- Paper and pencil to write with
- Permanent marker
- Sand
- Large pan or shoe box
- 6 pencils
- Beads, building blocks and other small toys
- Spoon
- Paintbrush
- Yarn
- Zippered sandwich bags
- Large bowl or second pan
Assembly Instructions
-
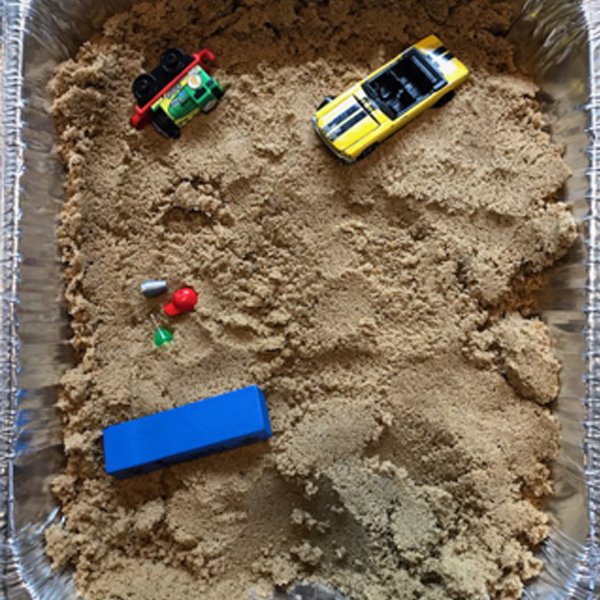
Parents, we recommend that you prep the dig site to make it a bit more challenging for your children. If possible, slightly wet sand works better for this activity than dry sand. Pour the sand into the pan and drop in the small toys as you add the sand, covering them. If you want to make it more challenging, wet down the sand after you’re done and let it dry before beginning to dig.
-
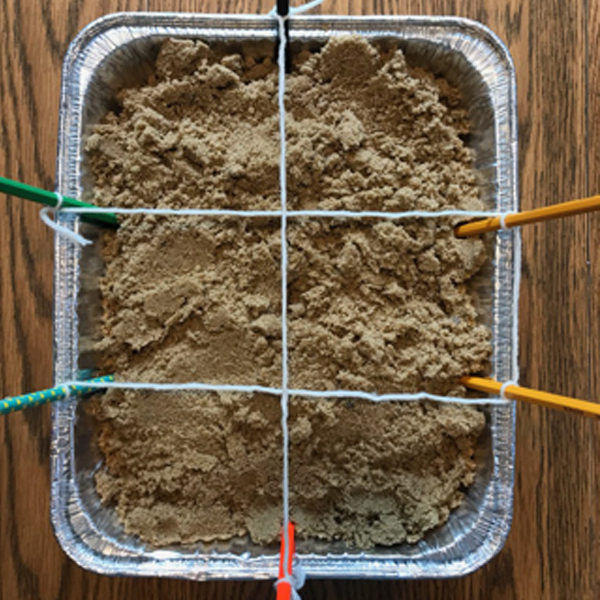
2. Place pencils alongside the perimeter of the pan. Use the yarn to create a grid pattern across the pan, with six sections.
-
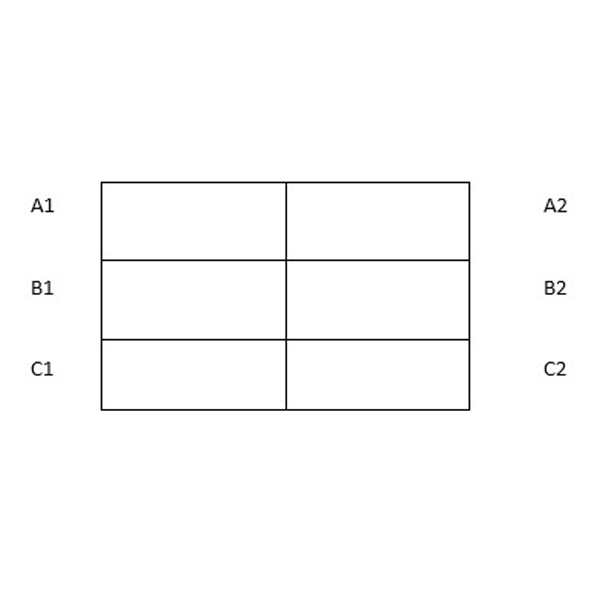
3. On your paper, draw your pan and grid. Each square is a quadrant. Label them as such:
-
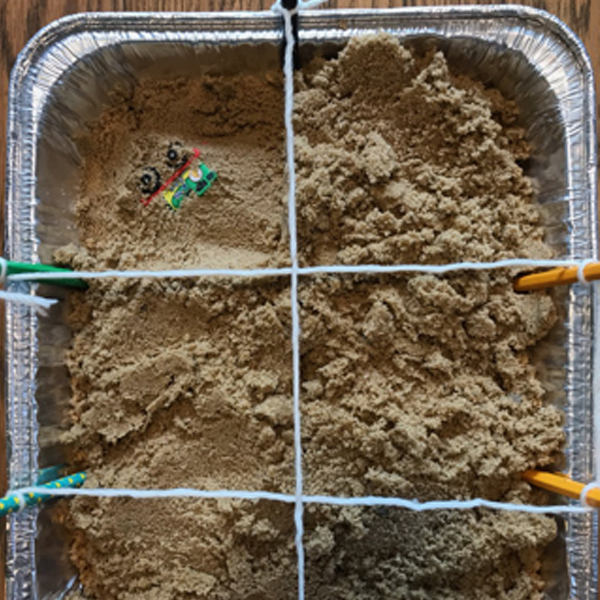
4. Start with A1. Use your spoon and paintbrush to slowly remove sand. As you remove sand, place it in your extra pan or bowl. Remove sand in an entire layer before digging deeper into a square. If something is discovered, draw on your paper what you discovered. Place the artifact in a plastic bag and label the plastic bag with the grid where you discovered it.
-
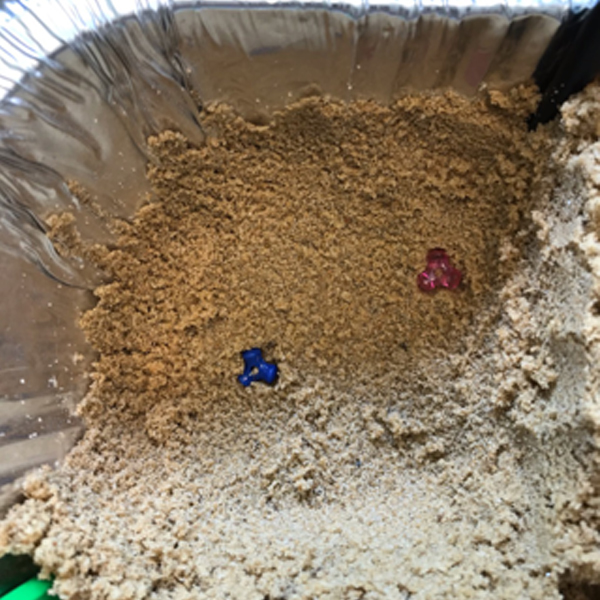
5. Once you complete all six quadrants, take a look at your artifacts. Can you identify what they are? Who could have used these objects? These guesses are also called inferences – guesses based on your observations as well as information you already know.
TIPS FOR PARENTS
During and after the activity, ask your child:
- Why do archaeologists dig in a grid pattern? How does that help them?
- What can we learn about artifacts based on where they are found?
- How do we learn more about the people who lived before us?
- If you dig too fast during a dig, what could happen?
- If someone was to go into your bedroom and pick up five things, would they know who you are? Would they know your interests?
READY TO CONTINUE EXPLORING?
- Is there a toy box or toy bin in your home? What can you learn about how the toys are placed in there? Most likely, the toys at the top were played with most recently. The toys at the bottom may not have been played with recently or shifted through the other toys.
- National Park Service Archeology for Kids
- American Museum of Natural History – Archaeology Clues from the Past
- Nat Geo Kids, All about Archaeology playlist
- Indiana Archaeology


